


Modern style wall painting and how to do it - NR 4
- KD art 4 you

- Apr 12, 2021
- 17 min read
Updated: Jul 14, 2021
Dry construction - gypsum plasterboards
Interior finishing at the highest level is no problem with today’s drywall systems. If the do-it-yourselfer does not want to struggle with mortar and stones when building a partition wall, or if he wants to set up a false ceiling or installation wall, he usually uses plasterboard. However, the success of the finishing work depends to a large extent on the conditions prevailing on the construction site during the finishing period. To ensure that the results of the dry construction work actually correspond to what is technically feasible at present, it makes sense to provide certain framework conditions. If the fabricator is able to clarify the situation on the construction site in advance and, before the actual start, considers what needs to be taken into account during the individual phases of the interior work, errors can be avoided and quality assured. Only an optimally prepared construction site will subsequently ensure an optimum long-term result.
Use of the
Due to the various properties such as low weight, simple and quick processing, high fire resistance and, compared to solid construction, lower surface loss due to thinner walls, gypsum plasterboard is mainly used for the production of lightweight, non-load-bearing interior walls, suspended ceilings, sloping roof claddings or screeds.
Due to its low water/moisture resistance, gypsum plasterboard should only be used indoors. With appropriate climatic conditions (high humidity) the cardboard layer can form a breeding ground for mould. Frequent condensation on the surface promotes the adhesion of microorganisms.

Interior fittings and claddings
Gypsum boards are used to produce non-load-bearing interior walls that can be easily removed or modified later. They are also used as so-called dry plaster, where gypsum boards are either glued directly to the raw wall with a fixing binder or mounted on a substructure.
For the cladding of sanitary installations, electrical lines and other technical equipment, so-called trunks are used ( also known as “trunks”, formerly “Rabit boxes” ). Such claddings are often found in the form of a pretext. Here the plates can be fastened to a conventional substructure. Two layers of plasterboard (impregnated if necessary) and a special primer should be used to fix tiles. The installation of maintenance openings for the installation lines is recommended.
Special use
Humid areas
For damp rooms there are impregnated boards with the designation GKFI or GKBI, which are coloured green for easy differentiation.
Gypsum building materials are not resistant to permanent moisture and lose their strength. Alternatively, cement fibre boards are used here. If the application of wall plaster or a tile covering is intended, also coated hard foam plates (building plates), calcium silicate plates, wood wool light building plates as well as stiff, plasterable mineral fiber plates are suitable.
Soundproofing
A disadvantage of dry walls compared to brick walls is their lower stability. Adjacent components such as the wooden construction of a loft bed can transmit noise to the gypsum boards, which is amplified by the resonance of the flexible boards. For this reason, it is generally recommended that connections to other components are acoustically decoupled by thin foam, felt or mineral wool strips.
The protection against airborne noise is achieved with plasterboard walls by the principle of flexible shells. For this it is necessary that a continuous outer surface (shell) is used.) of the building element is not connected to the second shell at all, or at least not rigidly. In the case of a wall, this is achieved, for example, by a double stud construction. A suspended ceiling can be attached to the load-bearing ceiling by spring hangers.
The sound insulation is improved by a layer of a special mineral or soft fibre board, which dampens the air flow in the cavity and thus the sound transmission. Wall openings e.g. sockets, light switches etc. reduce the sound insulation.
, gypsum boards, in perforated or slotted form, also as acoustic ceilings for room sound insulation. For this purpose, the ceilings are covered with a layer of absorbent material such as acoustic fleece, polyester fleece or mineral wool.
Fire protection
Gypsum contains chemically bound water, which is released as water vapour when heated up strongly and can therefore cool the adjacent components for a limited time.
With special plasterboard fire protection boards ( GK-F ) in the system ( according to manufacturer’s specifications and standards mentioned below ) fire resistance classes of F90 can be achieved without problems. Even underlying fire-sensitive components, such as steel structures, can be protected against the effects of fire.
According to the new DIN EN 520, the previous GKF boards (gypsum plasterboard fire protection boards or GKFI for impregnated boards) are referred to as type F (with improved structural cohesion of the core at high temperatures) or type D (with defined density).
The fire protection standard DIN 4102-4 specifies the maximum fixing distances for fire protection requirements. The maximum possible screw spacing is 25 cm on the wall and 17 cm on the ceiling, for example.
Radiation protection
Plates laminated with lead play a special role. The lamination serves to protect against X-rays and is primarily used in the medical field.

Workflow
The workflow on the construction site can be roughly divided into 4 phases in which different preparations have to be made.
I. Phase: Before delivery of the material
In order to ensure that the construction site runs smoothly at a later date, two things should be clarified urgently before the material is delivered:
1. Where should the delivered material be stored during the dismantling period? 2. When should the material be delivered?
The question of the best storage location deserves special attention in the run-up to site preparation and should not be considered only when the fully loaded truck is at the door. Important details could be overlooked during the hectic unloading process. The easiest way to answer this question is to look at the floor plan. A thorough study of the building plan should therefore always be at the beginning of any planning. A well chosen storage location must meet certain requirements:
• It should be located centrally, i.e. as close as possible to the processing location. • He may not block any traffic routes on the construction site and • It should not be located at a point where a partition wall is planned later.
Observance of these points ensures that the gypsum boards need to be transported back and forth as little as possible after delivery. This is important because any relocation of the material carries the risk of damage. The plaster core can break or the edges can be knocked out.
The load-bearing capacity of the floor construction should also be urgently clarified when determining the suitable storage location. Considering that a single pallet of standard panels weighs more than a ton, it quickly becomes clear that the storage of the material required for dry interior construction is usually associated with a high weight load. Floors that cannot cope with this, such as wooden beam constructions, often bend, resulting in irreversible damage. Not infrequently there is a danger of collapse. The question of the most favourable time for the delivery of materials depends on the general progress of the construction site. Above all, it is important that the material can be stored in a dry place. Since plastering and screed work usually leads to a drastic increase in the general air humidity, these should be completely completed and the screed or plastered walls should also be dried out before the plasterboards are delivered. In any case, sufficient ventilation of the construction site must be ensured.
This also applies if the windows were masked in connection with exterior plaster work. In this case too, ventilation must be used to ensure that the room humidity can escape.
Immediately before delivery, it is advisable to inspect the construction site and check the feasibility of the previous considerations on site. This opportunity should also be seized in order to establish a degree of order there. On the one hand, this ensures that the place designated for storing the material is not blocked by huge piles of rubbish and that an alternative location has to be found at the last minute. On the other hand, it also decisively improves the safety of the fitters and prevents accidents.
Processors who wear a plate only have a very limited field of vision due to its size. Parts lying around on the floor, no matter how small, become a high accident risk in this way!
Phase II: Delivery of the material
When the building materials are delivered, it must be ensured that they are stored straight and flat on a flat surface to avoid damage. Improper storage of panels, e.g. on edge, leads to deformations which impair proper assembly.
The supplied pallet can be used as a flat base. The same function is performed by bearing timbers arranged at a distance of approx. 35 cm. At the same time, this type of storage also ensures good ventilation of the material, which at the same time prevents the risk of mould formation.
Phase III: The processing of the material
1. to be observed in principle
When processing gypsum boards, it is important to ensure that the relative humidity in the room is not too high. If it is higher than 80%, work with gypsum boards should no longer be carried out. Experience has shown that the most favourable climatic range for the processing of gypsum boards is between 40 and 80% humidity.
It is important that the substructure is dry. This is especially true if it is made of wood. The maximum permissible wood moisture content is 20%. If this is not observed and the wood dries after planking, the result is deformation of the boards and cracking. There is also a risk of mould growth in the area of the substructure.
The same also applies to the construction of attics, as roof trusses are usually also wooden constructions. If gypsum boards are to be used as dry plaster on concrete or masonry, the substrate must also be correspondingly dry.
2. special case winter construction
If building is carried out in winter, the extension should only be carried out at room temperatures of more than + 5°C.
Avoid rapid and strong heating of the rooms. This can lead to stress cracks due to length changes. For the same reason, direct blowing of the plasterboard surfaces with hot or warm air should be avoided. It also applies to winter construction that sufficient ventilation must be provided in every case.
IV. Phase: Completion of the assembly work
Im Anschluss an die Montagearbeiten schließen sich üblicherweise die Spachtelarbeiten an. Auch in dieser Phase ist die ausreichende Belüftung der Baustelle dringend notwendig, denn die Platten müssen zusätzlich aufgenommene Feuchtigkeit wieder an den Raum abgeben. Erst wenn dies geschehen ist, dürfen die Spachtelarbeiten ausgeführt werden. Folge dieses Prozesses der Feuchtigkeitsabgabe nämlich ist eine Längenänderung der Platten, d.h. feuchte Platten sind länger und schrumpfen, sobald sie einen Teil ihrer Feuchtigkeit wieder an den Raum abgeben. Wird dieser Zeitpunkt nicht abgewartet und zu früh verspachtelt, sind Rissbildungen die Folge.
A change in the length volume can also be the result of heat exposure. This must be taken into account, for example, when filling with hot asphalt as screed. The heating caused by the hot asphalt leads to a change in the length volume. If it has already been filled before, tear open everything.
Important: Filler work must never be carried out at temperatures of less than +10°C. This applies both to the room temperature and to the surface temperature of the panel.
Processing
Plasterboard is not sawn, but broken to the desired size. First the building panel is scored with the cutter and then broken over an edge at the interface. After the break, the back side of the cardboard is also cut with the cutter.
The edges of the break should be chamfered so that filling is not so time-consuming. This means that the breaking edges are slightly bevelled with the cutter knife (approx. 45°) in order to optimise the durability of the putty in the seams.
The screws should also be slightly recessed in the gypsum plasterboard for easier filling during assembly.

Fixing gypsum plasterboards
Once the stud frame has been erected and all the necessary utensils are ready, the actual laying work can begin. The gypsum plasterboards are fixed to the metal or wooden substructure, aligned with the spirit level and fixed to the substructure with screws.
Here again the selected substructure must be taken into account. Drywall screws for metal constructions have a fine thread, whereas wood screws have a coarse thread. Protrusions and edges can be smoothed with a plaster plane after the boards have been fixed.
Gypsum plasterboards are made to measure using the breaking technique mentioned above. However, if curved or internal cuts for switches or sockets are required, the jigsaw, hand saw or hole circular saw must be used.
When laying gypsum plasterboards over the entire surface, the laying pattern should be observed. In order to avoid cross joints - which later tend to crack - the front edges of plasterboard boards fixed next to each other should be fixed with an offset of at least 400 mm, which makes it necessary to shorten the boards. In the case of double planking, the longitudinal and end edges must be mounted offset to the first layer. In the case of doors, due to the risk of cracking, care must be taken to ensure that the edge of the panel does not directly meet the course of the door frame.
To ensure that the entire construction also serves sound insulation, the entire construction consisting of substructure and planking must be decoupled to avoid sound bridges. For this reason, the gypsum boards are not placed flush on ceilings, walls or floors, but at a distance of several millimetres. Spacer wedges that can be pushed under the gypsum plasterboards are helpful here.
Once you have covered one side of the substructure, you can lay any desired cables behind it. Before you mount the back wall plasterboard, insert the insulating material between the ideally suitable spacing of the vertical stud frames.
Material
Usually, either natural gypsum obtained from mining or REA gypsum is used in the production process. This also explains the regional focus of the manufacturing plants on places where natural gypsum is found. Basically, both materials are of equal value. In practice, however, it has been shown that REA gypsum panels are somewhat lighter. Natural plasters are much more suitable for the production of custom-made products in which the panels have to be bent because they are more break-resistant. The reason for this is the arrangement of the individual gypsum crystals, which is more chaotic with natural gypsum than with REA gypsum.
Drywall screws are used for screwing ( SBS coarse for wooden substructures, fine for metal substructures ). These screws are phosphated (black surface coating) to avoid chemical reactions with the plaster and the resulting discoloration. Self-tapping screws are better than just pointed ones for the metal profiles.
For some years now, punching machines have been used on the construction site to cut or bend standardised sheet steel profiles to length. They work faster, quieter and cleaner than cut-off grinders or iron saws.
Additives
Some plastic, glass or cellulose fibres are mixed into the gypsum, these gypsum fibre boards are statically more resilient and can also be used in damp rooms.
Substructure
Walls
Today, metal profiles are mostly used as a substructure because, unlike the woods used in the past, they do not deform in damp conditions. Consequences such as stress cracks in the filling of the gypsum boards and fire acceleration can be avoided. This applies particularly to damp rooms or other areas with more strongly fluctuating humidity, such as bathrooms, utility rooms, kitchens, garages or house entrances. If no major temperature or humidity fluctuations are to be expected, rough sawn wood may be preferred to more expensive metal profiles (which, however, is not permitted according to most valid standards and processing instructions of the manufacturers). Gypsum boards can also be placed directly on prepared masonry by means of gypsum binder plugs or strips.
A substructure made of metal profiles consists vertically of C-shaped and horizontally on the ceiling and floor of U-shaped galvanized sheet steel profiles in widths of 50, 75, 100 ( more rarely: 125 and 150 ) mm. For door openings, special profiles with a higher material thickness, so-called U-stiffening profiles 2.0 mm, are to be used, which are force-locked to the so-called raw ceiling and the raw floor via fastening angles of the same material thickness; alternatively, squared lumber can be placed in the C-profiles. In the meantime, new I-shaped wood profiles are also being offered, which consist of dried layers of wood, some of which are glued crosswise, and which defuse the deformation problem. The 50 mm GK stud frame and double planking on both sides with 12.5 mm panels results in a wall 100 mm thick, with single planking 75 mm thick. In the case of double planking, the vertical 125 cm wide panels shall be offset by 62,5 cm and the transverse joints by at least 40 cm from each other. The first layer does not necessarily have to be filled (only prescribed for fire protection and sound insulation requirements). For sound insulation, before the profiles are attached to the building structure, a so-called connection seal, usually made of foam with a thickness of approx. 3.0 mm, is glued to the U- and the first and last C-profiles (i.e. the profiles that are attached to the adjacent components).
Ceilings
In the case of suspended ceilings, so-called hangers are common with which the galvanised sheet steel profiles are attached to the ceiling; these are so-called CD profiles and UD profiles in 28 mm. Edge profiles ( U-profiles ) provide the connection to the walls. Metal anchors are always used for hangers subject to tensile loads, since plastic anchors melt in the event of a fire (the fixing of hangers with plastic anchors is not permitted in most European countries, and there is currently no manufacturer who recommends and approves plastic anchors for the installation of hangers - keywords: softener shrinkage and embrittlement ) and cause the ceiling to collapse. The edge profiles have no load-bearing effect and may therefore also be used for fire protection ceilings with plastic dowels ( Attention, here it is absolutely necessary to consult the system supplier, as such a ceiling must be constructed exactly according to the available test certificates! ) can be fastened. However, it is essential to ensure that the first CD profile is mounted at a maximum distance of 100 mm from the wall.
In addition to suspension with metal profiles, a somewhat more complex and heavier suspension made of rough sawn wood is also possible.
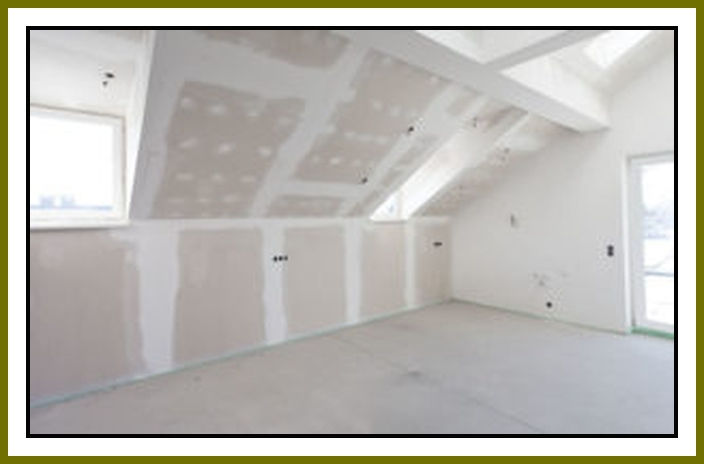
Special feature of the attic conversion
In the case of an attic conversion, GK panels less than 20 mm thick should not be attached directly to the wooden rafters from below. It is better to install a substructure made of wood or GK profiles prior to installation to compensate and protect against cracking. It is important not to damage the vapour control layer during this type of installation.
Last work
The wall, ceiling cladding or partition wall was constructed from plasterboard so that the screw connections, joints and joints can now be filled. When applying filling compound to joints, it is recommended to use joint cover strips to prevent cracking. The specialist trade has special end profiles available for corners and joints.
After the putty has dried, the wall or plasterboard construction can then be lightly sanded and dusted again to ensure an evenly smooth and clean surface.
Only then should the entire construction be treated with a primer, which depends on the subsequent work such as wallpapering, painting or plastering and completes the building. Tiles can also be applied to suitably prepared areas made of plasterboard.
Rigips grinding - walls and ceilings
Dry construction plasterboard grinding with random orbital sanders and orbital sanders
Plasterboard and plasterboard grinding is comparable. The correct filling of the joints is a basic prerequisite for simple and flawless work. Here it should be taken into account that no errors may occur when filling, because if errors occur, this will be noticed and regretted at the latest when sanding or painting the wall. The correct amount of filler must be used during the application of the filler.
One of the most important rules is never to grind on or off the sheetrock.
There are only a few possible errors that could occur when working on rigips. However, one should work on these with sure instinct, because it must not be forgotten that the plasterboard panels ultimately form the basis for later work, wallpapering or the like.
The surface must therefore be treated evenly so that it feels smooth when painted over. Therefore, possible errors are pointed out here so that they can be avoided.
Grinding valleys in the joint area
It can happen that the joints are sanded too much so that the edges appear again under the filler dimensions. At the beginning this cannot be seen too badly during a renovation, but after the wall or ceiling has been painted and the sunlight falls unfavourably, the individual panels are suddenly visible.
It is therefore important that the levelling joints are even and flat and sanded accordingly. There must be a clean transition between the white colour of the filler dimensions and the grey plate in the transition area.
Insufficient sanding of the filler dimensions
When sanding rigips, it can happen that the filler dimensions still have edges and grooves despite sanding. So if there are still unevennesses to be discovered after sanding, these have to be smoothed after. The grinding of grooves and edges is not recommended, as the same problem would arise here as with the faulty grinding of valleys.
Grinding dust can lead to soiling
Dust is generated during the grinding of sheetrock. This dust of the putty measures is not to be underestimated, because it spreads practically everywhere and the following cleaning is a pure strain. In order to avoid the contamination by the sanding dust, it is advisable to cover the furniture and the room to be renovated. At the same time it is recommended to vacuum the dust when grinding rigips.
Grinding rigips without dust
In fact, it is not possible to grind sheetrock 100 percent dust-free. If, however, you use grinding machines with dust extraction when grinding rigips, the spread of dust can be minimized.
The performance of the vacuum cleaner used is decisive for avoiding or minimising dust formation when sanding the filler dimensions. With a conventional and normal household vacuum cleaner it is almost impossible to avoid grinding dust. In order to minimise or even avoid dust during rigips grinding, it is necessary to use a grinding machine with a good seal to the grinding surface and a powerful vacuum cleaner.
So if there are several areas in the house in need of renovation, it is wise to buy a very good and powerful vacuum cleaner. Here you should pay attention to the accessories of the building vacuum cleaner.
Grinding rigips - the right tool
There are various tools that can be used for rigips grinding. It depends above all on the grinding device used whether the work becomes an extremely dusty affair or whether a fast and almost dust-free rigips grinding is possible. Therefore some devices for grinding rigips are presented here.
Practical hand sanders with an abrasive grid
The most practical device for grinding rigips is probably the hand grinder. This is especially practical when only smaller surfaces need to be machined. At the same time, reworking, for example at the edges, can also be carried out with the hand grinder. Also at the upper transitions one arrives with the device very well.
The problem with a hand sander, however, is that it lacks a good extraction system so that the dust produced by the spatula dimensions is not extracted. When you reach for a hand grinder, make sure it is stable so that you can achieve a flat surface. In addition, the grip shape of the hand grinder should also be taken into account. The handle should be ergonomic. This has the advantage that the fingers do not get blisters during rigips grinding. In addition, the hands do not tire so quickly during work.
Grids are particularly suitable for drywall construction. Thanks to the grid structure, the grinding dust does not settle so heavily in the grinding grid. If the grille is still clogged with dust, you can simply knock it out. This is not possible with conventional sandpaper, but only leads to an increased consumption of sandpaper.
Abrasive grids can be obtained in different categories from different manufacturers. However, it is advisable to obtain both grinding grids and hand grinders from the same manufacturer. This means that you can assume that the abrasive grid on the hand grinder
Grinding plasterboard with an orbital sander and extraction system
In addition to a hand sander, an orbital sander with suction can be used. You can get simple models for little money. If you buy one, make sure that the unit has an appropriate connection for suction. For the orbital sander, an abrasive paper with a grain size of 80 should be used. After the first plaster plaster sanding, a sanding paper with the grain size 120 should be used in the second sanding pass. This gives you a wonderful surface for future work.
Rigips grinding with a long-neck grinder with extraction
A long-neck grinder, also known as a grinding giraffe, is particularly suitable for the professional drywall worker. The grinder allows you to work on walls and ceilings without having to use a ladder.
The long-neck sander is designed in its design and the good sealing around the grinding disc so that practically dust-free rigips grinding is possible. When using the device, follow the manufacturer’s instructions. In addition, the correct abrasive paper should best be used by the same manufacturer.
Conclusion
The success of their drywall work is largely in the hands of the fabricators themselves. It is worthwhile to use some thoughts on the expansion in advance, because the framework conditions can be controlled and influenced favourably through precise prior planning. The key to success in dry interior construction is adequate ventilation throughout the entire construction period.
_________________________________________________________________________________________
Continue reading on the next blog - Modern style wall painting and how to do it
________________________________________________________________________________


Comments